Note: You can find original document at that site: http://marckean.wordpress.com/2012/07/19/installing-scom-2012-agent-on-a-non-domain-workgroup-windows-server-core-computer-using-the-command-line/
after read that document be carefull to set dmz agent server host file sample like that scomsrv.domainname.com be careful setting dmz agent primary dns suffix and netbios name it must be same whit sertificate name sample: dmzagent.domainname.com.
The following are the list of steps that I took to install the Operations Manager (OpsMgr) 2012 agent on a workgroup based Windows Server Core 2008 R2 computer using certificates and without using a gateway server. Sometimes you might have a few servers in a workgroup e.g. DMZ that need to be monitored, so the below are the exact steps I took with the help of this article from Microsoft http://support.microsoft.com/kb/947691 In fact, these steps for the certificate template, requesting certificates, adding certificates to the local computer store and using the momcertimport tool are all exactly the same for adding certificates to gateway servers (communication between gateway and management servers), also agents (communication between the agent and gateway servers). See this link from the Microsoft TechNet Library for firewall rules using port 5723. I am writing this from the perspective of the command line, so that it will work for GUI based and non-GUI servers.
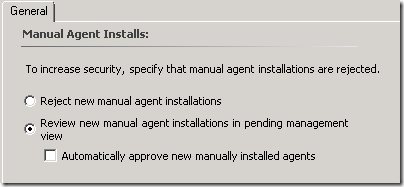
The first thing you need to do is get the workgroup based computers/servers to trust your internal domain certificate authority/PKI. So you’ll need to download the certificate chain as a .p7b file, then import this into the Server Core workgroup server. This ensures that the workgroup server can fully trust your domain based certificate authority, so that later the workgroup Server Core workgroup server can successfully take part in the certificate exchange. I am assuming here that your Operations Manager server is in the same domain as the certificate authority.Prior to starting, make sure you change the security for manual agent installs to Review new manual agent installations in pending management view. This setting can be found under Administration > Security.
- Logon to the certificate authority issuing server http://<certificateserver>/certsrv or https://<certificateserver>/certsrv from a domain based computer in the same domain where your certificate authority lives.
- Click Download a CA certificate, certificate chain, or URL

- Select Base 64 and click on Download CA certificate chain
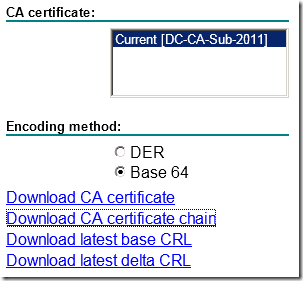
- Save the .p7b file to a location on your computer.
- Now you will need to give yourself access to the Server Core workgroup server from the same domain based computer that you are on. Open command prompt > type in cmdkey /add:<ServerName> /user:<UserName> /pass:<password> Where: ServerName is the name of the server running the Server Core installation, and UserName is the name of an administrator account in the format of <servername>\<username>.
- Open the Microsoft Management Console (mmc.exe), click start > run > type mmc > click OK.
- Click on File > Add/Remove Snap-in > click Certificates on the left > click Add > Click Computer Account > Another Computer. Here you type in the name of the Server Core workgroup computer, then click Finish. Click OK to the other box.
- Expand the Certificates node > expand Trusted Root Certification Authorities
- Right click on the Certificates folder > choose All Tasks > Import.
- Browse to the .p7b file you created before > click next > click next > click Finish.
- Open Certificate Templates, Click Start > click Run > type mmc > click OK.
- From the File menu, click Add/Remove Snap-in > click Add > under Add Standalone Snap-in, click Certificate templates > click Add > click Certification Authority > choose local computer > click Finish > click OK.
This is what you will see:

- Click Certificate Templates > right click Computer > select duplicate template. Select Windows Server 2003
- On the General Tab type a name like ‘OpsMgrWorkGroup’
- On the Request Handling > select Allow private key to be exported
- Click the Subject name tab > click Supply in the Request option
- On the Security Tab, Authenticated users, Domain Admins, Domain Computers and Enterprise Admins should have Enroll and Auto Enroll permissions.
- Add the new template to the CA. Right click Certificate Templates > New > certificate template to issue > choose the template you just created
- Verify that the new template appears in the details pane, and then verify that the Server Authentication entry and the Client Authentication entry appear under Intended Purpose.
- Open command prompt > type in gpupdate /force > hit enter.
The next thing you will need to do is request and import a certificate for the Management Server and on the workgroup computerThis is what you will see:

- Create a certificate request .inf file:
For most non-domain workgroup computers, the CN= equals NetBIOS name. Example: Subject="CN=MyWorkGroupPC". However, this may not work and you might receive errors in the event log after you finish all these steps. In this case, look for Event ID: 20052 in the Operations Manager event Log on the agent machine.
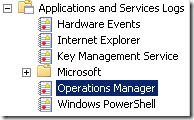 Event 20052
The specified certificate could not be loaded because the Subject name on the certificate does not match the local computer name
Certificate Subject Name: dc-au-hv-20
Computer Name: DC-AU-HV-20.domain.local
To make sure you enter the correct CN name for the certificate in the request file, you can do a ping -a 1.1.1.30 on the server using it’s IP address, this should return the correct CN name to use.
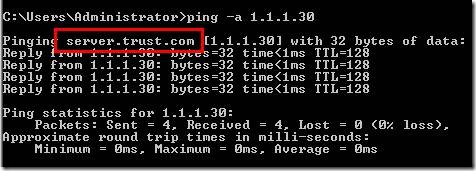 And here’s the contents of the request file:
[NewRequest]
Subject="CN=<FQDN>"
Exportable=TRUE
KeyLength=2048
KeySpec=1
KeyUsage=0xf0
MachineKeySet=TRUE
[EnhancedKeyUsageExtension]
OID=1.3.6.1.5.5.7.3.1
OID=1.3.6.1.5.5.7.3.2
Save as RequestConfig.inf
- Convert the INF into a binary REQ file. Run the following command line to create BinaryRequest.req from RequestConfig.inf
certreq -new -f RequestConfig.inf BinaryRequest.req - Now you will need to submit the request to your domain based certificate authority. Submit the binary request to the CA and retrieve the resulting certificate. Run the following command line to submit BinaryRequest.req to CorpCA
- From a domain based computer, logon to http://<certificateserver>/certsrv or https://<certificateserver>/certsrv > click Request a certificate.

- Click on Advanced certificate request
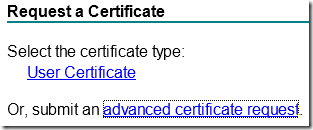
- Click on Submit a certificate request by using a base-64-encoded CMC or PKCS #10 file, or submit a renewal request by using a base-64-encoded PKCS #7 file.

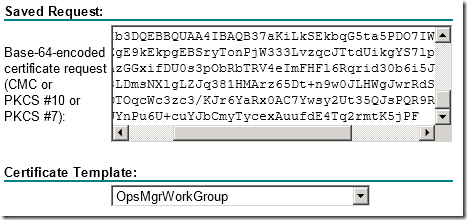
- Paste the contents of the BinaryRequest.req file you created above into the box > select the OperationsManagerCert template > click Submit
- Retrieve the certificate. Select Base 64 encoded > click on Download certificate
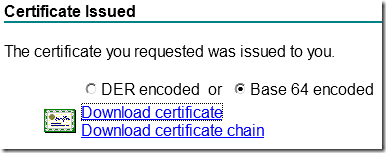
Download the certificate and save as NewCertificate.cer
- From a domain based computer, logon to http://<certificateserver>/certsrv or https://<certificateserver>/certsrv > click Request a certificate.
- Copy the NewCertificate.cer file to the workgroup computer > run the following command to install the certificate into the Local Computer Personal store
certreq -accept NewCertificate.cer
Thanks to the following pages for the above information:
Export the private key from the the management server and on the workgroup computer
- Click Start, click Run, type cmd, and then press ENTER.
- Type in certutil.exe -privatekey -exportpfx <Subject Name of certificate> <filename>.pfx nochain
- Type in a password twice to confirm.
The next thing that you will need to do is manually install the agent on the workgroup computer - The MOMAgent.msi agent can be found on the management server C:\Program Files\System Center 2012\Operations Manager\Server\AgentManagement\amd64. Make sure you have access to this directory from the Server Core workgroup server.
- The following example shows a fresh installation of an agent and uses the Local System for the Action Account. When installing the agent on a computer that needs to connect to the gateway server, under Management Server, rather than specifying the name of your management server, specify the name of the gateway server. So you’ll need name resolution in the form of hosts files if no DNS works outside your organisation.
msiexec.exe /i \\path\Directory\MOMAgent.msi USE_SETTINGS_FROM_AD=0 MANAGEMENT_GROUP=<MG_Name> MANAGEMENT_SERVER_DNS=<MSDNSName> ACTIONS_USE_COMPUTER_ACCOUNT=1 USE_MANUALLY_SPECIFIED_SETTINGS=1 SET_ACTIONS_ACCOUNT=1
The Momcertimport tool is used to enter the serial number of the specific certificate in the registry. You must follow these steps on the management server and on the workgroup computer. Make sure that the Operations Manager agent is installed on the workgroup computer. Otherwise, you will receive an error when you run the Momcertimport tool.
- Click Start >click Run.
- In the Open field, type cmd > click OK.
- Type the following command, and then press ENTER:
MOMCertImport.exe <filename>.pfx
The MOMCertImport.exe tool can be found in the Support Tools folder of the Operations Manager installation media.
- Restart the OpsMgr Health service (aka System Center Management). Don’t forget to do this on the management server and the workgroup computer.
- sc stop HealthService
- sc start HealthService
To uninstall the agent, should you need to, run the following command:
- msiexec.exe /x <path>\MOMAgent.msi
Hiç yorum yok:
Yorum Gönder